|
Finishing & Painting Tips
by Greg Wilkerson
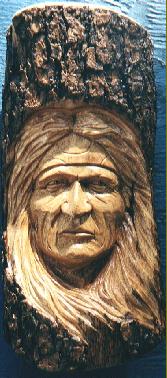
There are as many ways to finish and paint woodcarvings as there are woodcarvers. The following tips seem to work for me, I hope you will find them helpful.
Step 1: After all the carving is done on a project I sand it, using very fine almost worn out sandpaper. I am only wanting to smooth the carving up before staining it, not to remove burs or shape the wood as this should be done with your carving tools.
Step 2: Wipe off sanding dust and apply the stain of your choice. I use Minwax Golden Oak Woodfinish, which both stains and seals the wood. You may apply using either brush or rag, wipe off the excess.
Step 3: Spray with Deft Clear Gloss Wood Finish. I prefer the gloss as it seems to be a harder finish and I am going to use steel wool which will take the shine off anyway. Allow to dry at least 1 hour.
Step 4: Lightly rub all over the carving with #0000 steel wool. The stain and the Deft have raised the grain, the steel wool will leave the carving smooth again.
Step 5: Spray with the Deft again, allow to dray. If the carving is smooth feeling you are ready to apply the paint. If not repeat step 4 until the carving is smooth.
Step 6: Apply oil paint with a dry artists brush. When I dip the brush in the paint I dob it on the pallet until all globs of paint are gone and there is only a hint of color on the brush( dob & glob may not be the technical terms for what I am describing but I hope you know what I mean). Applying the oil paint over the stain and finish with a dry brush will allow the grain of the wood to show thru if you wipe off the painted areas as you go, you can always apply more paint if you desire a deeper color.
Step 7(optional): After the painting is complete you may want to shade in various areas. I use burnt umber to shade, again using a dry brush.
Step 8: After all painting and shading is done I again spray the carving with the Deft, you may use either gloss or semi-gloss depending on your preference.Your done, enjoy the fruit of your labor.
|
|